The Pokemon App in React is one of the most important Apps that one should make as a beginner to test his skills and knowledge of React.
This App will test us from the ground up as it will test –
- Basic understanding of React, Reusable Components, Passing and Receiving Props
- Basic but important knowledge on Hooks
- Fetching data from API and using it according to the design standards
In this blog, we will make a pokemon with the help of hooks and other React basics that will look like this at the very end.
Let’s begin…
Index
Getting Started
We will be using a very popular Pokemon API which many of us have heard of – pokeapi and make a simple but stunning application in React.
In this App, we will be using many of the React basics under a single roof like Hooks, Props, Reusable Components, event handling, etc, and we will be fetching details from the API using the simple fetch method with Async-Await that I hope we all know how to use.
We will be using Bootstrap and Vanilla CSS for styling purposes, but will not discuss them here as we only want to focus on the React part.
Creating the React App – Pokemon App
It’s easy to create a React App – go to your working directory in any of your preferred IDEs and enter the following command in the terminal.
npx create-react-app react-pokedex
If you are unsure how to properly set up a create-react-app project you can refer to the official guide here at create-react-app-dev.
After the setup, run npm start in the same terminal to start the localhost:3000 where our React app will be hosted. We can also see all our changes there.
Working on the UI part of the App
The UI part of our app is distributed into two-part. One part has the input field and the search button that will trigger the hook to get data from the API while the other part will show us that result.
import React from "react";
import Pokemon from "./Pokemon.png";

const App = () => {
  return (
    <>
      <div className="container-fluid">
        <div className="row">
          <div className="col-12 text-center text-white bg-danger py-3 pb-4">
            <div>
              <img src={Pokemon} alt="pokemon" className="poke" />
            </div>
            <input
              type="text"
              placeholder="Enter name of Pokemon"
              className="col-2 py-1 my-3"
            />
            <button className="btn-warning py-1 px-2 mx-2 text-white fw-bold fs-5">
              See Stats
            </button>
          </div>
        </div>
      </div>
    </>
  );
};
The above code describes the first part of the app – the input section. There is nothing in this part that needs explaining except the image. We have imported the image from our src folder and used it in the app.

Using useState Hook
useState hook is used for managing different states that an App has. For more details visit the link.
In this case, we are making six of them, four are for details that we will fetch from the API in a short, and the rest of them are used so that we can use the four states with ease.
  const [pokemon, setPokemon] = useState(); // input value
  const [singlePokemon, setSinglePokemon] = useState([]); // pokemon array
  const [type, setType] = useState();
  const [moves, setMoves] = useState();
  const [img, setImg] = useState();
  const [loading, setLoading] = useState(true);
Let’s update our input section with the states.
We will add the value attribute and the onChange event handler to get the word from the input field and show respective results in our Pokedex section.
   <input
      type="text"
      placeholder="Enter name of Pokemon"
      value={pokemon}
      onChange={enterName}
      className="col-2 py-1 my-3"
     />
And now to see their respective function through which we will get the value of the input field –
 const enterName = (e) => {
    setPokemon(e.target.value);
  };
Using the useEffect Hook for API calls
There are many ways of making our API calls like using Axios, but for simplicity, we will be using the async-await with a fetch to fetch the data from API.
   const fetchPokemonList = async () => {
    const poke = await fetch(`https://pokeapi.co/api/v2/pokemon/${pokemon}`);
    const pokeJ = await poke.json();
    console.log(pokeJ);
  };
  useEffect(() => {
    fetchPokemonList();
  }, []);
Let’s give the button the onClick functionality and test the results out using console.log as is shown in the above code
<button className="btn-warning py-1 px-2 mx-2 text-white fw-bold fs-5" onClick={Search}>See Stats </button>
const Search = () => {
    if (pokemon === "") {
      alert("Give me a name to search");
    } else {
      fetchPokemonList();
      setPokemon("");
    }
  };
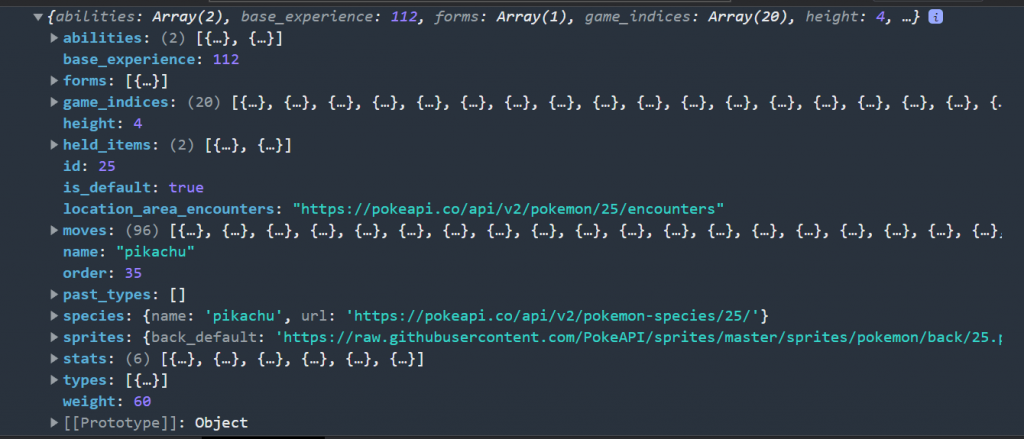
We will be getting something like this in the console, this is the JSON data from which we have to fetch the required details.

We will be dealing with image, height, weight, base experience, moves, and type in our Pokemon App.
But it’s up to you to choose the details that you want your App to have.
So the function which we coded for fetching these details will be updated as –
const fetchPokemonList = async () => {
    const poke = await fetch(`https://pokeapi.co/api/v2/pokemon/${lower}`);
    const pokeJ = await poke.json();
    console.log(pokeJ);
    setSinglePokemon(pokeJ);
    setType(pokeJ.types[0].type.name);
    setMoves(pokeJ.moves.length);
    setImg(pokeJ.sprites["front_default"]);
    setLoading(false);
  };
  useEffect(() => {
    fetchPokemonList();
  }, []);

  const enterName = (e) => {
    setPokemon(e.target.value);
  };

  const Search = () => {
    if (pokemon === "") {
      alert("Give me a name to search");
    } else {
      setLower(pokemon.toLowerCase());
      fetchPokemonList();
      setPokemon("");
    }
  };
Working on the Pokedex Section of the App
Now that we have seen the input section and how it is working both in front and behind the scenes. It’s time to work on the main section of the app which will display the results that we have fetched from the API.
For this section, we have to be well-versed in props.
We will be destructuring the props at the receiving end so that we don’t have to write props every time we use them.
           {loading ? (
            <div className="col-12 text-center fs-2 fw-bold p-5 mt-5">
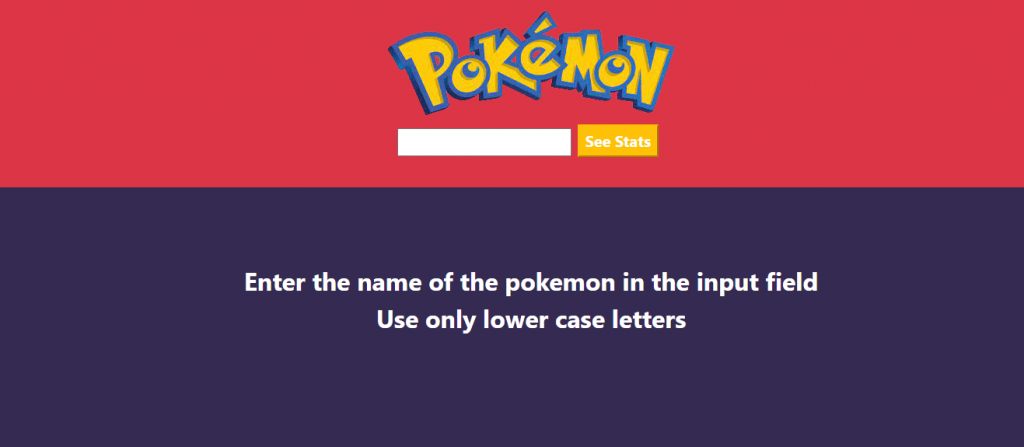
              Enter the name of the pokemon in the input field
            </div>
          ) : (
            <PokemonList
              singlePokemon={singlePokemon}
              moves={moves}
              type={type}
              img={img}
            />
          )}
The state loading is initially true, as we have seen in the useState section, and was turned to false in the useEffect section when the API call was made and we want to display the results – conditional rendering.
It will look like this with this loading state as true

import React from "react";
import Rock from "./Rock.jpg";
const PokemonList = ({ singlePokemon, type, moves, img }) => {
  return (
    <>
      <div className="container-fluid">
        <div className="row py-5 text-center">
          <div className="col-4"></div>
          <div className="pokemon py-4">
            <div id="img">
              <img src={Rock} alt="rock" id="image" />
              <div className="img">
                <img src={img} alt={singlePokemon.name} className="image" />
              </div>
            </div>
            <div className="text-capitalize fs-1 fw-bold">
              {singlePokemon.name}
            </div>
            <div className="tet-capitalize text-start py-2">
              <div className="fs-4 text-capitalize d-flex justify-content-between">
                <span className="fs-4 fw-bold">Type</span>
                <span className="fs-5">{type}</span>
              </div>
              <div className="fs-4 text-capitalize d-flex justify-content-between">
                <span className="fs-4 fw-bold">Weight</span>
                <span className="fs-5">{singlePokemon.weight}lbs</span>
              </div>
              <div className="fs-4 text-capitalize d-flex justify-content-between">
                <span className="fs-4 fw-bold">Height</span>
                <span className="fs-5">{singlePokemon.height}"</span>
              </div>
              <div className="fs-4 text-capitalize d-flex justify-content-between">
                <span className="fs-4 fw-bold">Battles Won</span>
                <span className="fs-5">{singlePokemon.base_experience}</span>
              </div>
              <div className="fs-4 text-capitalize d-flex justify-content-between">
                <span className="fs-4 fw-bold">No. of Moves</span>
                <span className="fs-5">{moves}</span>
              </div>
            </div>
          </div>
        </div>
      </div>
    </>
  );
};

export default PokemonList;
We have used the props and the states to show the details that we have fetched from the API.
Finally, our App will look like this

The problem we faced at the very end was that the API was not giving the data for all queries made in either uppercase or capitalized text in the input field.
It will only be returning data from lowercase queries as the names in the API are all in lowercase.
We came up with a solution to pass the query by first converting it into lowercase with the toLowerCase() method but that method is taking an extra step – for converting the query into lowercase before passing it to the useEffect hook for the API call.
Conclusion
We all have watched pokemon, and to remember those days, we have made this app in React with the pokeapi.
It also teaches us at which point we are still lacking in React as it covers all the basic stuff that a React Developer should know and should work on.

